What You'll Learn
- How to set up a workspace on Structurizr
- How to add other users to your workspace
- How to add Structurizr support to your project
- How to document the layers of your code
- How to scan Spring Boot code for components
- How to add your own components to the model
- How to edit the diagram in Structurizr
Documenting key decisions enables others to understand the reasoning behind your design and how it has evolved over time.
Your system will be subjected to changing forces over time and it will need to adapt. The current state may not make sense in isolation, but being able to understand the broader context and the history of how the current state was reached can increase understanding.
By documenting the model as code, the model is part of the source of the system and should be managed as such (just as much as the application code or the tests).
At the end of this tutorial, you should be able to view a set of diagrams representing a simple Spring Boot application.
Go to Structurizr.com and register using your "‘@cardiff.ac.uk"' address. We have an academic licence based on this email suffix.
- check for any confirmation emails and respond.
- Login to Structurizr
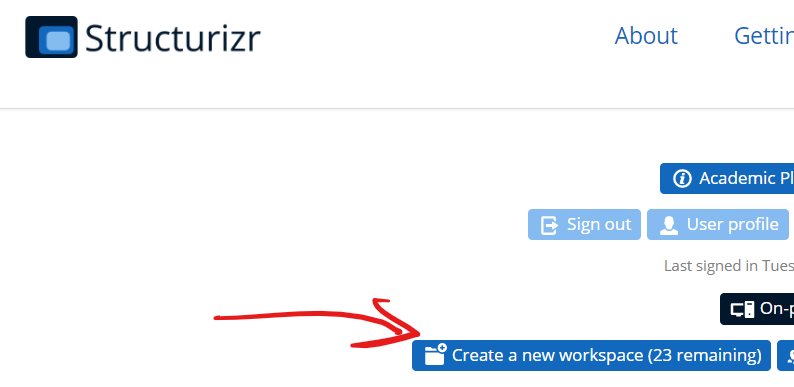
Click on "Create a new workspace".
You don't need to do anymore at this point for an individual workspace. We will add users to this workspace later so that you can share it in your team.
Click on your user id (top right) to get back to the list of workspaces.
We are going to add Structurizr code as part of our test suite. Therefore, we need Structurizr's java client library to be on the test classpath. Add the following lines to your dependencies block.
testCompile 'com.structurizr:structurizr-core:1.6.2'
testCompile 'com.structurizr:structurizr-client:1.6.2'
testCompile 'com.structurizr:structurizr-spring:1.3.5'
In your test code, create a new Java package. For example, under uk.ac.cf.cm6213.springbootexamples, create a new package called structurizr.
In that package, create a new class called "GenerateModel" and create a public method called "generateModel". Annotate this new method with @Test (it is standard JUnit test) and add any required imports.
To use Structurizr from your Java code, you will need to provide some parameters.
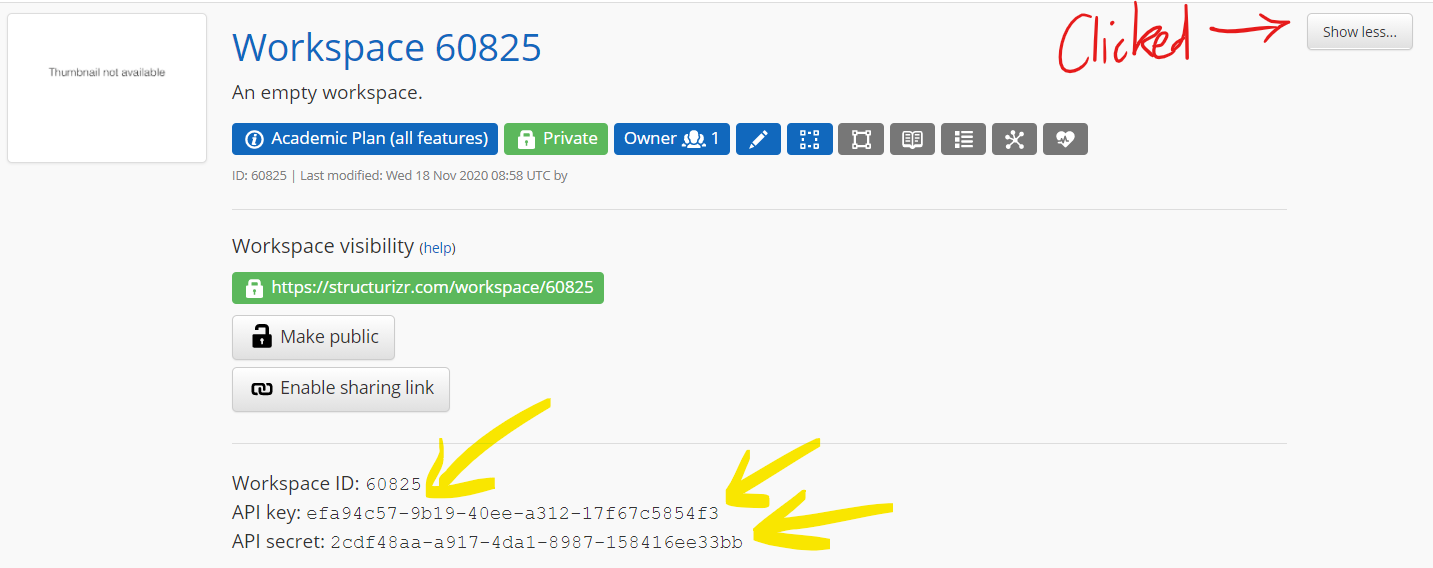
Go back to your workspace, click the "Show more..." button on the right and find the following items:
- The workspace id
- The API key
- The API secret
Have these fields at hand (maybe use WIN+V to store them on the clipboard?)
Create fields in your class for these fields.
public class GenerateModel {

    private final static int WORKSPACE_ID = <YOUR WORKSPACE>;
    private final static String API_KEY = "<YOUR API KEY>";
    private final static String API_SECRET= "<YOUR API SECRET>";

    @Test
       public void generateModel() throws Exception {
         //...
We need to create objects to represent the workspace and the model in code.
Provide the name of the workspace and a description as parameters.
Workspace workspace = new Workspace("Greeting Maker", "Sample Spring Boot Project");
 Model model = workspace.getModel();
Now we want to create the top layer in our model. This is the highest altitude view and should be understandable to the client.
At this point, don't worry about the visuals. You are modelling the system at this point, not drawing it.
In our sample project, our system can be called by users and because of the API, it can also be called by external systems.
Structurizr provides classes that represent key abstractions in our model such as a software system or a person.
Let's create some objects in our code.
SoftwareSystem greetingMaker = model.addSoftwareSystem("Greeting Maker", "Online greeting making made simple.");
       Person customer = model.addPerson("Customer", "  A person who wishes to send a greeting");
       SoftwareSystem greetingClient = model.addSoftwareSystem("External System", "An external client that requires a source of greetings.");
Here, we've created two software systems and a user.
Now, we need to model the relationships. Our external system and our user "use" our system.
customer.uses(greetingMaker, "Uses");
greetingClient.uses(greetingMaker,"Uses");
Add some views
Now we want to add some views to the workspace.
ViewSet viewSet = workspace.getViews();
SystemContextView contextView = viewSet.createSystemContextView(greetingMaker, "context", "The System Context diagram for the Greeting system.");
contextView.addAllSoftwareSystems();
contextView.addAllPeople();
Here, we've created a set of views, then added a context view to that set. To that view, we add all of the software systems and all of the people.
Style the viewSet
We can add some styling to the view now. Notice how the code separates the model, the view and the styles.
greetingMaker.addTags("Greeting Maker");

Styles styles = viewSet.getConfiguration().getStyles();
 styles.addElementStyle("Greeting Maker").background("#6CB33E").color("#ffffff");
 styles.addElementStyle(Tags.PERSON).background("#519823").color("#ffffff").shape(Shape.Person);
Now we need to send the model to Structurizr.
This is where our three fields are needed. If you've created the three fields from earlier, you can now add this code.
StructurizrClient structurizrClient = new StructurizrClient(API_KEY, API_SECRET);

structurizrClient.putWorkspace(WORKSPACE_ID, workspace);
Using IntelliJ, run the test. If you open the document, make sure you close it as your tests will fail if you the workspace is open on the server.
test {
    exclude 'uk/ac/cf/cm6213/springbootexamples/structurizr/**'
}
Go back to Structurizr and view the workspace. You should now see a single view.
The next layer down in the C4 model is the container layer. The term container represents a deployable unit so it fits nicely with the ideas of Docker and microservice. In our simple application, it is more akin to a process and we will typically have two processes running; the Spring Boot server and a database. If we were using React or similar, we'd have a separate node.js server running and that would be a separate container in our layer.
Here is the code for the model AND the view.
//model
Container webApplication = greetingMaker.addContainer(
        "Spring Boot Application", "The web application", "Embedded web container.  Tomcat 7.0");
Container relationalDatabase = greetingMaker.addContainer(
        "Relational Database", "Stores information regarding greetings and the greeting types", "Maria DB");
customer.uses(webApplication, "Uses", "HTML/HTTP");
greetingClient.uses(webApplication, "Uses", "JSON/HTTP");
webApplication.uses(relationalDatabase, "Reads from and writes to", "JDBC, port 3306");

//view
ContainerView containerView = viewSet.createContainerView(greetingMaker, "containers", "The Containers diagram for the Greetings System.");
containerView.addAllPeople();
containerView.addAllSoftwareSystems();
containerView.addAllContainers();
We can add styles to the new elements, by adding tags and then styling the tags.
//tag
relationalDatabase.addTags("Database");
//style
styles.addElementStyle(Tags.CONTAINER).background("#91D366").color("#ffffff");
styles.addElementStyle("Database").shape(Shape.Cylinder);
A typical application will have a large number of components and we want to keep those in sync with our source code. Structurizr provides a scanner that uses reflection to detect Spring components in our code.
Create a component finder
Add this code (note the package name. The finder will scan all packages under this).
ComponentFinder componentFinder = new ComponentFinder(
        webApplication,
        "uk.ac.cf.cm6213.springbootexamples",
        new SpringComponentFinderStrategy(
                new ReferencedTypesSupportingTypesStrategy()
        ));
Scan for SpringComponentFinderStrategy
Now tell the finder to find components.
componentFinder.findComponents();
Model the relationships that the finder can't work about
We need to add some extra information to our model. For example, our user will interact with the controllers. Our external system will interact with the Rest controllers and our repositories will interact with our database.
We can use lambdas to set up these relationships.
webApplication.getComponents().stream()
        .filter(c -> c.getTechnology().equals(SpringComponentFinderStrategy.SPRING_MVC_CONTROLLER))
        .forEach(c -> customer.uses(c, "Uses", "HTTP"));

// connect the external service to all of the Spring Rest controllers
webApplication.getComponents().stream()
        .filter(c -> c.getTechnology().equals(SpringComponentFinderStrategy.SPRING_REST_CONTROLLER))
        .forEach(c -> greetingClient.uses(c, "Uses", "HTTP"));

// connect all of the repository components to the relational database
webApplication.getComponents().stream()
        .filter(c -> c.getTechnology().equals(SpringComponentFinderStrategy.SPRING_REPOSITORY))
        .forEach(c -> c.uses(relationalDatabase, "Reads from and writes to", "JDBC"));
Now we add a component view.
ComponentView componentView = viewSet.createComponentView(webApplication, "components", "The Components diagram for the Charity 2018 web application.");
componentView.addAllComponents();
componentView.addAllPeople();
componentView.add(greetingClient);
componentView.add(relationalDatabase);
...add some tags...
webApplication.getComponents().stream().filter(c -> c.getTechnology().equals(SpringComponentFinderStrategy.SPRING_MVC_CONTROLLER)).forEach(c -> c.addTags("Spring MVC Controller"));
 webApplication.getComponents().stream().filter(c -> c.getTechnology().equals(SpringComponentFinderStrategy.SPRING_REST_CONTROLLER)).forEach(c -> c.addTags("Spring REST Controller"));

 webApplication.getComponents().stream().filter(c -> c.getTechnology().equals(SpringComponentFinderStrategy.SPRING_SERVICE)).forEach(c -> c.addTags("Spring Service"));
 webApplication.getComponents().stream().filter(c -> c.getTechnology().equals(SpringComponentFinderStrategy.SPRING_REPOSITORY)).forEach(c -> c.addTags("Spring Repository"));
...and add some styles...
styles.addElementStyle("Spring REST Controller").background("#D4FFC6").color("#000000");

styles.addElementStyle("Spring MVC Controller").background("#D4F3C0").color("#000000");
styles.addElementStyle("Spring Service").background("#6CB33E").color("#000000");
styles.addElementStyle("Spring Repository").background("#95D46C").color("#000000");
Run the test and then visit your workspace.
You can open each diagram and then edit it.
Your diagram may look a bit clustered. You can apply an auto-layout.
Click the Auto-layout button and choose the "GraphViz" style.
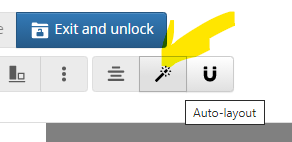
Your diagram will be laid out in a more useful format.
Auto-layout at code level
There appears to be a hidden method that allows you to set auto-layout in code. Adding this line appears to instruct the server to automatically layout the view.
Add this anywhere after the creation of the view object and before the workspace is submitted.
componentView.enableAutomaticLayout();
The scanner won't pick up every component and it certainly won't pick up the UX elements (HTML, CSS, JS files). These can be added manually to the component model.
We can add components and link them to existing components.
Component greetingTemplate = webApplication.addComponent("GreetingList", "Template to show Greetings","Thymeleaf");
greetingTemplate.addTags("Thymeleaf");

Component exampleController = webApplication.getComponentOfType("uk.ac.cf.cm6213.springbootexamples.web.ExampleController");

exampleController.uses(greetingTemplate,"as view","Spring MVC");
In this example, the code:
- Creates a new component to represent a template that uses Thymeleaf.
- We add a tag to the new component.
- Uses the full class name to find an existing components
- Links the components together using
uses.
We can style the templates by applying a style to all components tagged with "Thymeleaf".
You can apply this for all missing components (Security configuration, CSS, etc).
You can also enter ADRs into Structurizr.
In your workspace, there is a toolbar and one of the buttons is the "Edit" button.

You will then see a representation on your model and at the top, there is another toolbar.

Click on this and then add your decisions. They will appear at the bottom of your workspace.
Structurizr can also scan your source code. It will use the top-level JavaDoc comment as the description of your component.
To do this, we need to amend the scanning code. Replace the block that starts with:
ComponentFinder componentFinder = new ComponentFinder(
...with...
File sourceRoot = new File("C:\\Projects\\Examples\\CM6213-2021\\spring-boot-examples");

       // and now automatically find all Spring @Controller, @RestController, @Component, @Service and @Repository components
       ComponentFinder componentFinder = new ComponentFinder(
               webApplication,
               "uk.ac.cf.cm6213.springbootexamples",
               new SpringComponentFinderStrategy(
                       new ReferencedTypesSupportingTypesStrategy()
               ),
               new SourceCodeComponentFinderStrategy(new File(sourceRoot, "/src/main/java/"), 150)

               );
Your next line should then be:
componentFinder.findComponents();
In Structurizr, go to your workspace and click the user button.

You can now add users using their @cardiff.ac.uk email account. You can also transfer ownership to a registered user.
Adding a user generates an email. Please tell the invited user to click their email as they do expire.
Do look around the other features of Structurizr such as the various visualisations as this will show how a model can generate different outputs.