What You'll Learn
- Running Spring Boot using gradle bootrun
- Running Spring Boot using a terminal
In IntelliJ, create a new project as per the "Starting Spring Boot" tutorial.
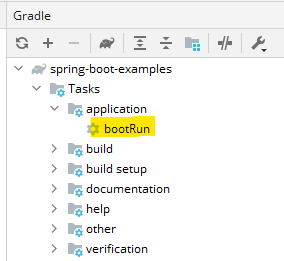
In the gradle pane (typically to the right-hand side of the IDE), under the name of the project, select Tasks > application > bootRun.
Double-click on bootRun.
Observe the Run pane (typically at the middle-bottom of the IDE).
You will see Gradle start to run and a set of tasks complete.
You will then see a series of log messages.
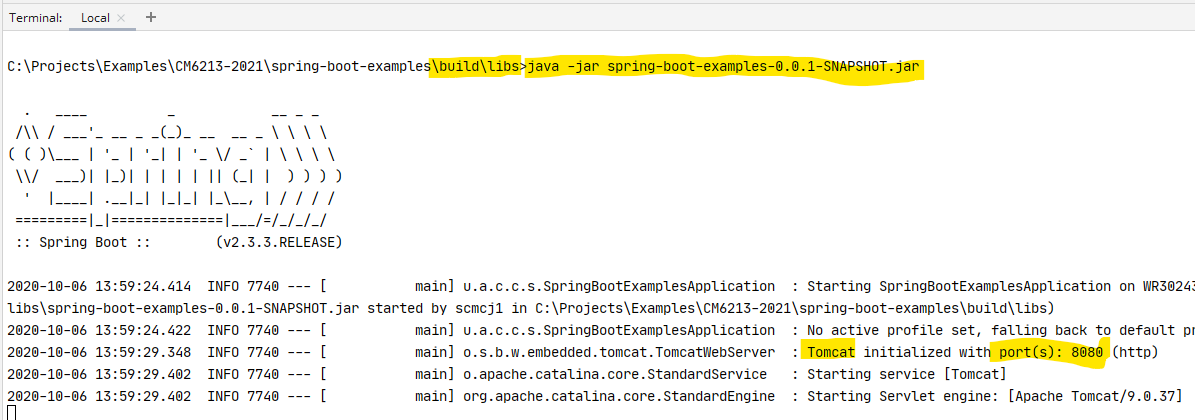
In the log, you will see that a Tomcat server has been started and that the server is now listening on port 8080. This is the default port. It can easily be changed using application properties by setting the server.port property.
Observe the running server
Open a browser and go to http://localhost:8080. You should see a generic error message. This shows that a server is running, but that no content has been added and that the server doesn't know how to handle any requests as yet. We will address that soon in other tutorials.
Reloading a development server
Since we are using DevTools, we don't have to restart the server everytime. In IntelliJ, we can rebuild the code by typing CTRL-F9 (or we can rebuild using Gradle). This will cause the server to reload and you can use a LiveReload plugin in a browser to detect the change and refresh the page.
IntelliJ Settings
To get this to work in IntelliJ, you need to:
- Check the box "Build project automatically" in Settings > Build, Execution, Deployment > Compiler.
- Type CTRL-ALT-SHIFT-/ and select "1 - Registry"
- Ensure the setting "compiler.automake.allow.when.app.running" is checked.
Build the JAR file
In the gradle pane, select Tasks > build > build.
This time, we are creating an executable JAR file that we can then run.
The build process includes the execution of the automated tests.
To leave out tests (you'll never do that right!) you run Tasks > build > assemble.
Run the JAR file
Open a terminal (either in IntelliJ, the Windows command prompt or git bash).
Open the ./build/libs directory. In there, you will find a JAR file. Let's assume it's called app.jar. It will actually be named after the artifact name that you provided at setup.
To run this, execute the following in the terminal:
java -jar app.jar
In the latest version of Spring Boot, two Jar files will be created. One will be suffixed with ‘-plain'. This doesn't contain the application server and is not executable.
You have seen two ways to run a Spring Boot project. When allied with Spring Boot DevTools, you will see how to become a little bit more productive. Remember, Java is a compiled language so it's always going to be a bit slower to start than interpreted languages, but you get back the savings of a typed language as type errors will be caught at compile time rather than at run-time.