What You'll Learn
- Converting the service into a Spring component
- Injecting the service as a dependency into the controller
- Iterating over a collection in a template
Having made our architectural decision, we now need to use the "independently" designed service layer within the application so we need to link the service to a suitable controller so that requests from the web can be routed to the service and transformed (or adapted) to the requirements of the web user interface.
ASIDE : Correct the package structure
In the Gitlab project, you'll see that I've corrected a mis-click in the web package. The "controllers" class is deleted and a "controllers" package has been added within the "web" package.
We've already seen examples of dependency injection. For example, the Model object was automatically injected by Spring into the controller methods.
We've also discussed the role of annotations such as @Controller in telling Spring that classes represent components (or beans).
We are going to apply the same pattern to our service layer. This doesn't impact the existing code or the existing test, but it does provide metadata to Spring that it can then use.
Add the @Service annotation to the CharitySearchImpl class.
@Service
public class CharitySearchImpl implements CharitySearch {
In the "web/controllers" package, add a class called CharitySearchController and add this code:
@Controller
public class CharitySearchController {

    private CharitySearch charitySearch;

    public CharitySearchController(CharitySearch aCharitySearch) {
        charitySearch = aCharitySearch;
    }

    @GetMapping("/charities")
    public String showAllCharities(Model model) {
        List<CharityDTO> charityDTOList = charitySearch.findAll();
        model.addAttribute("charityList", charityDTOList);
        return "charity-list";

    }
}
As before, this is another controller component and it contains one @GetMapping annotated method. This method will handle GET requests to "/charities" and will direct the user to a page that shows all of the charities.
Injecting the Service
The controller's role is to handle web concerns. It takes a web request and adapts it into a business action or event. In this case, the web request is for a list of charities. The controller delegates the retrieval of the data to the service layer, and then passes the received data to a template.
To get a service object, the controller could simply construct one using new. This would hard-code the implementation of the service into the controller and (in the future) we may want to use a different implementation (can you think of any reasons why?)
What we choose to do is use "dependency injection" again, but this time we want to inject one of our own components - namely the service.
The constructor of the controller accepts a parameter of type CharitySearch (the interface!) and the private field is set equal to that parameter.
Spring takes responsibilty for injection the dependency. It knows that there is a class that implements the desired interface and it knows that that class is annotated as a service (a type of Spring component) and using that data it can instantiate an instance of the implementation class and pass it to the constructor.
If there is only one constructor, Spring will use that one. If there are two, then the constructor to use must be annotated with @Autowired.
Call the Service
In the showAllCharities method, we can use the charity service as normal and call its method to get the list of DTO objects.
We put the list on the model with the key of "charityList" and then direct the flow to a new template called "charity-list".
We create a new template (you should know where now) called "charity-list.html".
This template shows the charities on a web page and looks like this:
<!DOCTYPE html SYSTEM "http://www.thymeleaf.org/dtd/xhtml1-strict-thymeleaf-4.dtd">
<html lang="en" xmlns:th="http://www.thymeleaf.org">
<head>
    <meta charset="UTF-8">
    <title>Charity List</title>
    <link th:replace="fragments/header :: bootstrap-css"></link>


</head>
<body>
<div th:replace="fragments/header :: header"/>

<div class="container" th:if="${!charityList.isEmpty}">
    <h1>Our charities</h1>
    <hr>
    <ul class="list-group" th:each="charity : ${charityList}">
        <li class="list-group-item"><a th:href="@{/charity/{furl}(furl=${charity.furl})}"
                                       th:text="${charity.name}"></a>
        </li>
    </ul>
</div>

<div class="container" th:if="${charityList.isEmpty}">
    No matching charities.
</div>

<hr>

<script th:replace="fragments/footer :: bootstrap-js"></script>
</body>
</html>
One thing to note: the html tag now contains a namespace declaration. This keeps the HTML valid.
We have some new Thymeleaf annotations.
<div class="container" th:if="${!charityList.isEmpty}">
The th:if annotation checks the condition in the expression and will include or exclude that element accordingly.
<ul class="list-group" th:each="charity : ${charityList}">
The th:each attribute supports iteration. It is like a "for-each" statement in Java. Each charity in the loop is addressable via the charity variable.
<li class="list-group-item"><a th:href="@{/charity/{furl}(furl=${charity.furl})}"
                               th:text="${charity.name}"></a>
In this block, we reuse the th:text attribute to get the name field of the charity object.
We also use the th:href attribute to create a dynamic link. This is one of Thymeleaf's more awkward bit of syntax. The first part is the URL with substitutions. In this case, we will substitute a value into {furl}. The second part (between parentheses) provides the value of "furl" (as the value of the furl field on the charity object). We don't need to use "getFurl" as the "get" is expected, so we can add a getFurl() method to the CharityDTO class.
For now, we will test manually. Start the server and go to "http://localhost:8080/charities". You should see the following.
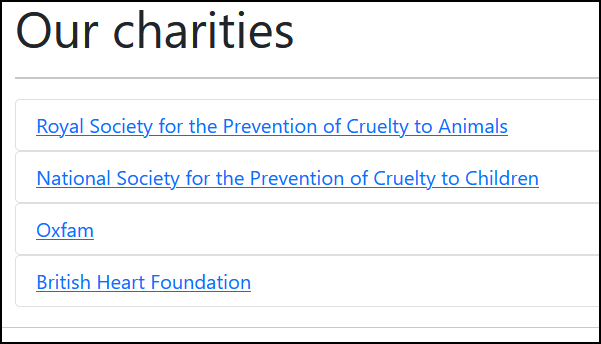
We now have an integrated solution that handles web requests, passes the action to an injected service layer that returns DTOs that are then iterated over in an extended template that contains conditional logic.
Important takeaways from this tutorial are:
- dependency injection. This is a key part of Spring, but also an important design principle in its own right. You don't have to use Spring to do dependency injection (or DI). There are other frameworks and it is also quite possible to code to that principle directly. There are also times when it may be excessive to use DI. Reading around this subject and looking for many voices on the subject will enhance your understanding of this principle. Start by looking for references on SOLID (DI is the 'D' in SOLID) and then look for articles that question the validity of the SOLID principles (Dan North has one).