What You'll Learn
- Adding another static file
- Observing the routing behaviour of Spring Boot
- Adding a route
In IntelliJ, build on the previous project where we added an index.html file.
Under /main/resources/static create a folder called images and add a suitable image logo file.
Add a suitable tag to the index.html file to include this image.
<img alt="Charity Giving Logo" src="/images/cg-logo.jpg"/>
Pay special attention to the URL. It starts with "/" so it is a root-relative. That /main/resources/static is consider to be part of the root of the server.
- Use the reload trick that you learned to test this change.
Go to http://localhost:8080 in a browser of your choice.
As an exercise for you (this isn't included in the Gitlab project) create another static HTML page and try to access it. What URL allows you to access the page and what doesn't? HINT: you should need to provide the full file name including the ".html" suffix.
Spring Boot's routing
Spring Boot has a set of conventions. It was happy to map the index route, but it treats all other HTML files in static as ".html" routes.
We can get around this.
Add a router class
We're now going to add our first application code to Spring Boot.
Create a new package in your Java code. Make it a sub-package of the package created when you generated the application.
For example, in this example, we've added the "web" package.
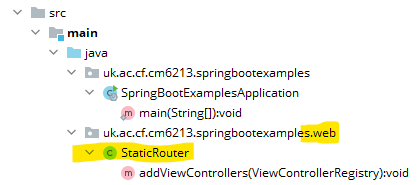
In that package, add a class called "StaticRouter" and add this code to it (amending the package to suit your own). Again, this code is not included in the Gitlab project, but is included here as an alternative.
package uk.ac.cf.cm6213.springbootexamples.web;

import org.springframework.context.annotation.Configuration;
import org.springframework.web.servlet.config.annotation.ViewControllerRegistry;
import org.springframework.web.servlet.config.annotation.WebMvcConfigurer;

@Configuration
public class StaticRouter implements WebMvcConfigurer {

  @Override
  public void addViewControllers(ViewControllerRegistry registry) {
    registry.addViewController("/about-us").setViewName("forward:/about-us.html");
  }

}
In this example, we've assumed that the static file that was added was called about-us.html.
We can see a few things in this code.
- It uses an annotation
@Configuration. This tells Spring Boot that this is a configuration component. The annotation tells Spring when to run the code. - The class implements an interface provided by Spring. This is another way in which frameworks can provide reusable code. Essentially, they are saying that if the application developer provides an implementation of this interface, they will call it.
- The interface requires one method to be implemented, and in this method, we map the route "about-us" to the HTML page "about-us.html".
- Run the gradle > build > classes task.
- Test "about-us.html"
- Test "about-us" - does it work now?
In this tutorial, we've added static content and learnt a bit about Spring's routing rules.